Paper troubleshooting
To help avoid paper jams, only use paper types that are recommended for your HP all-
in-one. For a list of recommended papers, see the onscreen HP Image Zone Help, or
go to
www.hp.com/support
.
Do not load curled or wrinkled paper, or paper with bent or torn edges, into the input
tray. For more information, see
Avoid paper jams
.
If paper does become jammed in your device, follow these instructions to clear the
paper jam.
Paper has jammed the HP all-in-one
Solution
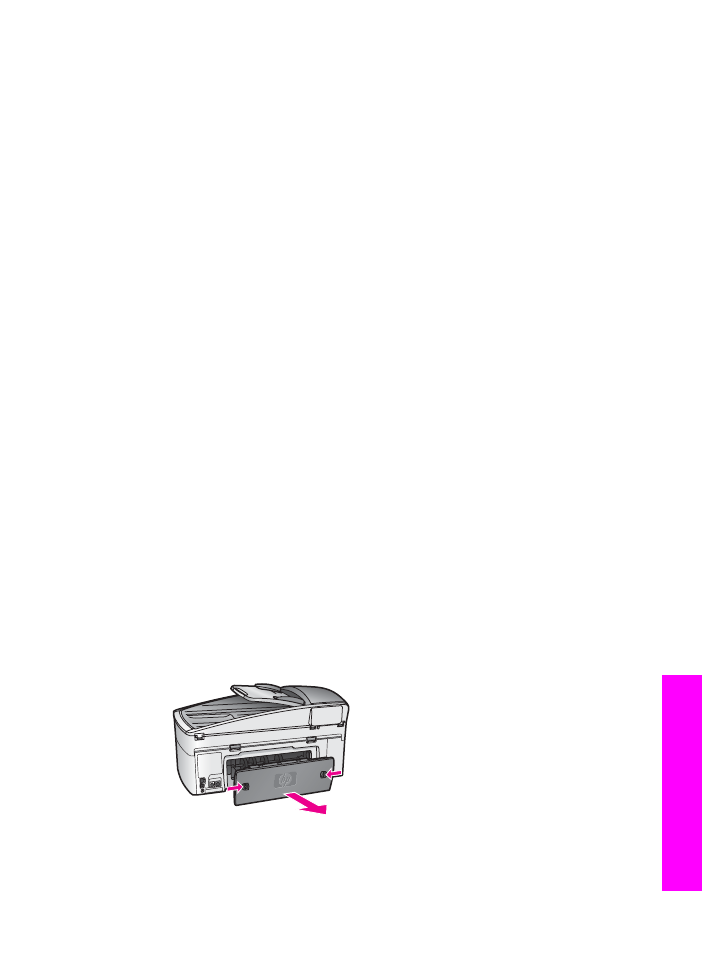
1
Press in the tabs on the rear clean-out door to remove the door as shown
below.
If your HP all-in-one came with a two-sided printing accessory, your device
might not have the rear clean-out door shown here. To remove a paper jam,
you might have to remove the accessory instead. For more information, see
the printed guide that came with your two-sided printing accessory.
User Guide
191
Troubleshooting
information
Caution
Trying to clear a paper jam from the front of the HP all-in-one
can damage the print mechanism. Always access and clear paper jams
through the rear clean-out door.
2
Gently pull the paper out of the rollers.
Warning
If the paper tears when you are removing it from the rollers,
check the rollers and wheels for torn pieces of paper that might be
remaining inside the device. If you do not remove all the pieces of
paper from the HP all-in-one, more paper jams are likely to occur.
3
Replace the rear clean-out door. Gently push the door forward until it snaps
into place.
4
Press
OK
to continue the current job.
Paper has jammed the automatic document feeder
Solution
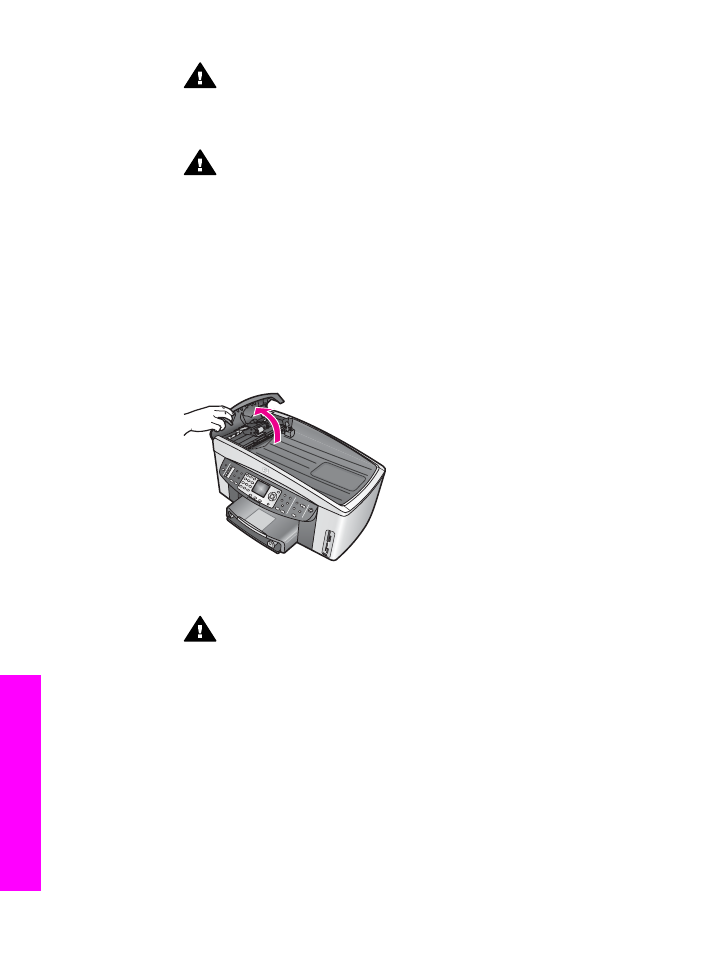
1
Pull the document feeder tray from the HP all-in-one to remove it.
2
Lift the cover of the automatic document feeder.
3
Gently pull the paper out of the rollers.
Warning
If the paper tears when you are removing it from the rollers,
check the rollers and wheels for torn pieces of paper that might be
remaining inside the automatic document feeder. If you do not remove
all the pieces of paper from the HP all-in-one, more paper jams are
likely to occur.
In the rare occurrence of a severe paper jam, you might need to
remove the face plate from the front of the automatic document feeder
and lift the pick assembly to remove torn pieces of paper from deep
inside the automatic document feeder. For more information, see
The
automatic document feeder picks up too many pages or none at all
.
4
Close the cover of the automatic document feeder, and then reattach the
document feeder tray.
Paper has jammed the optional two-sided printing accessory
Chapter 16
192
HP Officejet 7300/7400 series all-in-one
Troubleshooting
information

Solution
You might need to remove the two-sided printing accessory. For more information,
see the printed guide that came with your two-sided printing accessory.
Note
If you turned the HP all-in-one off before clearing the paper jam, turn it back
on, and then restart your print, copy, or fax job.
The automatic document feeder picks up too many pages or none at all
Cause
You need to clean the separator pad or rollers inside the automatic document
feeder. Pencil lead, wax, or ink can build up on the rollers and separator pad after
extensive use, or if you copy handwritten originals or originals that are heavy with
ink.
●
If the automatic document feeder does not pick up any pages at all, the rollers
inside the automatic document feeder need to be cleaned.
●
If the automatic document feeder picks up multiple pages instead of single
sheets, the separator pad inside the automatic document feeder needs to be
cleaned.
Solution
Load one or two sheets of unused plain white full-size paper into the document
feeder tray, and then press
Start Copy Black
to pull the pages through the
automatic document feeder. The plain paper releases and absorbs residue from the
rollers and separator pad.
Tip
If the automatic document feeder does not pick up the plain paper, try
cleaning the front roller. Wipe the roller with a soft lint-free cloth dampened
with distilled water.
If the problem persists, or the automatic document feeder does not pick up the plain
paper, you can clean the rollers and separator pad manually. Remove the face
plate from the front of the automatic document feeder to access the pick assembly
inside the automatic document feeder, clean the rollers or separator pad, and then
reattach the face plate, as described in the following procedures.
To remove the face plate from the front of the automatic document feeder
1
Remove all originals from the document feeder tray.
Tip
You might find it easier to work with the automatic document feeder if you
first remove the document feeder tray.
2
Lift the cover of the automatic document feeder, as shown in Figure 1.
User Guide
193
Troubleshooting
information

Figure 1
3
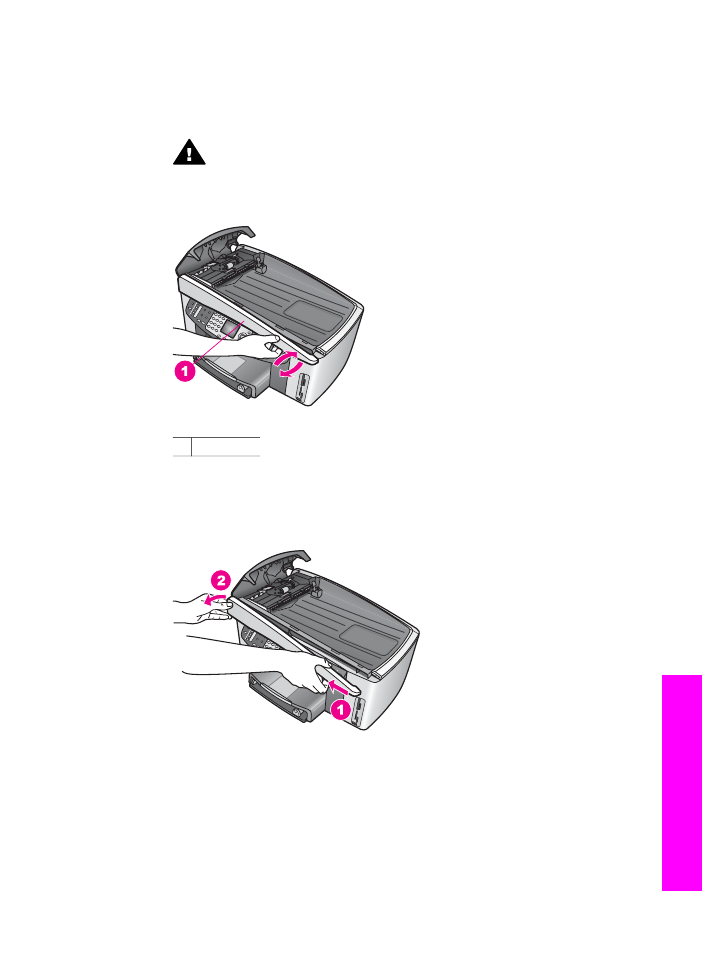
Lift the lid on the HP all-in-one, as if you were loading an original on the glass.
Figure 2 shows the lid open and the location of a notch (1) near the top right
edge of the lid backing (2).
Figure 2
1 Notch
2 Lid backing
4
Place one or two fingers in the notch, as shown in Figure 3.
Figure 3
5
Keep your fingers in the notch as you lower the lid back down until the lid is
almost closed.
Chapter 16
194
HP Officejet 7300/7400 series all-in-one
Troubleshooting
information
6
Push against the top of the face plate (1) with your thumb as you pull the
bottom away from the right side of the HP all-in-one with your fingers, as
shown in Figure 4.
Use a slight twisting motion to help release the face plate on the right side.
Warning
Do not pull the face plate all the way off yet. There is a
plastic catch on the far left inside of the face plate that helps secure the
face plate in place. If you pull the face plate straight off, you might
damage the plastic catch on the inside of the face plate.
Figure 4
1 Face plate
7
As shown in Figure 5, slide the face plate left (1) until the plastic catch on the
left side is not touching any part of the HP all-in-one, then pull the face plate
away from the device (2).
Figure 5
To clean the rollers or separator pad
1
Use the blue-green handle (1) shown in Figure 6 to lift the pick assembly (2).
User Guide
195
Troubleshooting
information
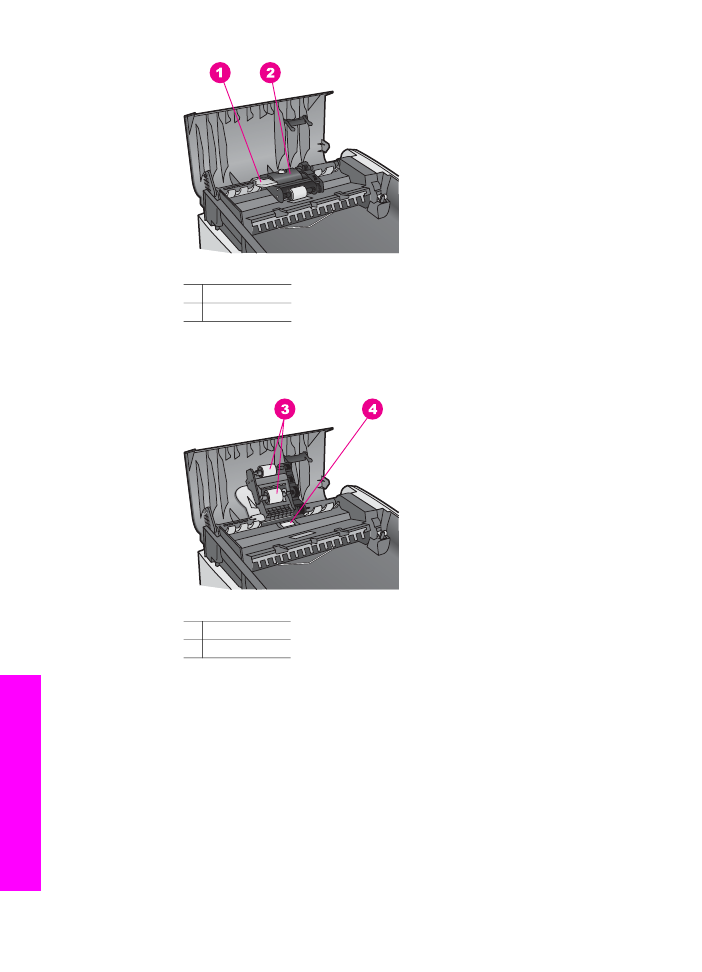
Figure 6
1 Handle
2 Pick assembly
This provides easy access to the rollers (3) and separator pad (4), as shown in
Figure 7.
Figure 7
3 Rollers
4 Separator pad
2
Lightly dampen a clean lint-free cloth with distilled water, then squeeze any
excess liquid from the cloth.
3
Use the damp cloth to wipe any residue off the rollers or separator pad.
4
If the residue does not come off using distilled water, try using isopropyl
(rubbing) alcohol.
5
Use the blue-green handle to lower the pick assembly.
To reattach the face plate to the front of the automatic document feeder
1
As shown in Figure 8, hook the face plate onto the left side of the HP all-in-one
so that the plastic catch (2) on the far left inside of the face plate catches on
the notch (1) on the front of the automatic document feeder.
Chapter 16
196
HP Officejet 7300/7400 series all-in-one
Troubleshooting
information
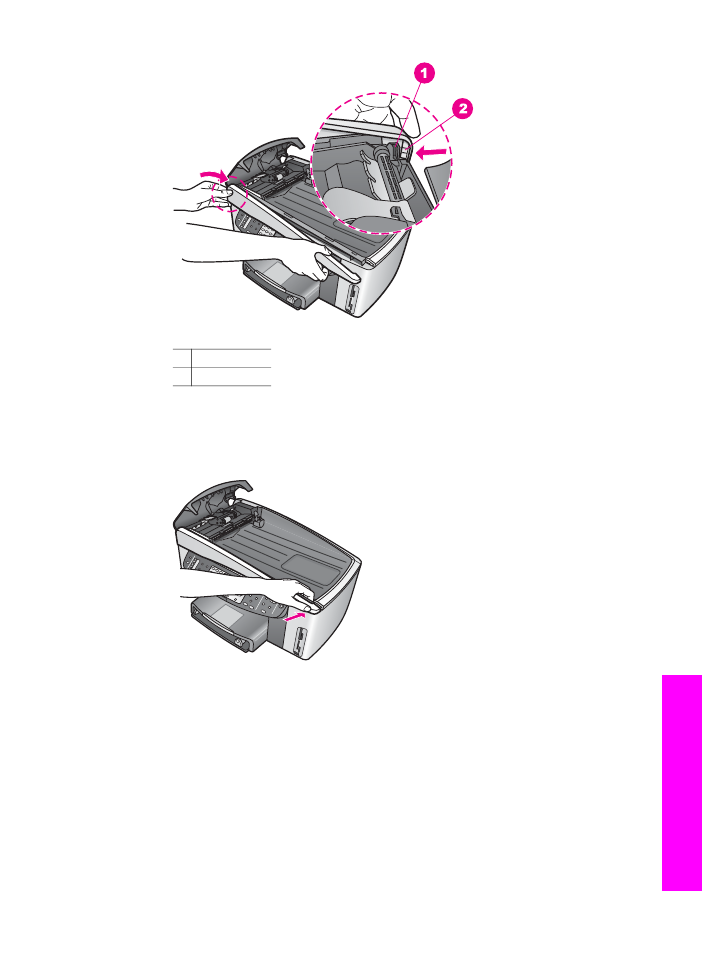
Figure 8
1 Notch
2 Plastic catch
2
Line up the right edge of the face plate with the right side of the HP all-in-one,
and then press the right side of the face plate until it snaps securely into place,
as shown in Figure 9.
Figure 9
3
Place your hands towards the center of the face plate, as shown in Figure 10,
then press until the center of the face plate snaps into place.
You should hear clicks when the left side snaps into place and when the right
side snaps into place.
User Guide
197
Troubleshooting
information

Figure 10
4
Close the cover of the automatic document feeder.
5
If you removed the document feeder tray, reattach it.